

Windows 11 is currently Microsoft’s newest and most updated version of Windows. It will probably continue to receive many updates with innovations for a long time. However, even though you have upgraded to Windows 11, you may not like it or be dissatisfied. In this article, we explain step by step how you can go back to Windows 10 after switching to Windows 11.
Microsoft has made it very easy to go back to Windows 10 from the settings page on Windows 11 computers. The biggest reason for this is that after upgrading to Windows 11, a copy of Windows 10 is stored on your computer for 10 days. This makes it very convenient for you if you want to go back after upgrading.
But before you do this, there is something you should remember. You may need to reinstall some programs and applications after the return.
Going Back to Windows 10 from Windows 11
This part of our guide will be valid if you have upgraded your computer to Windows 11 within the last 10 days. But you don’t need to worry. If you want to do this after more than 10 days, there are different methods for this. So you can decide which method you want to use.
Step 1: If you want to go back to Windows 10 on your Windows 11 computer, the first thing you need to do is enter the Settings page. To do this, you can access the Settings page by right-clicking the Windows button at the bottom left.
Step 2: After the settings page opens, first click on the button on the left. System Select the option. Then scroll down a bit Recovery You should see an option that says: You can also access this page from Windows Update > Update History page.
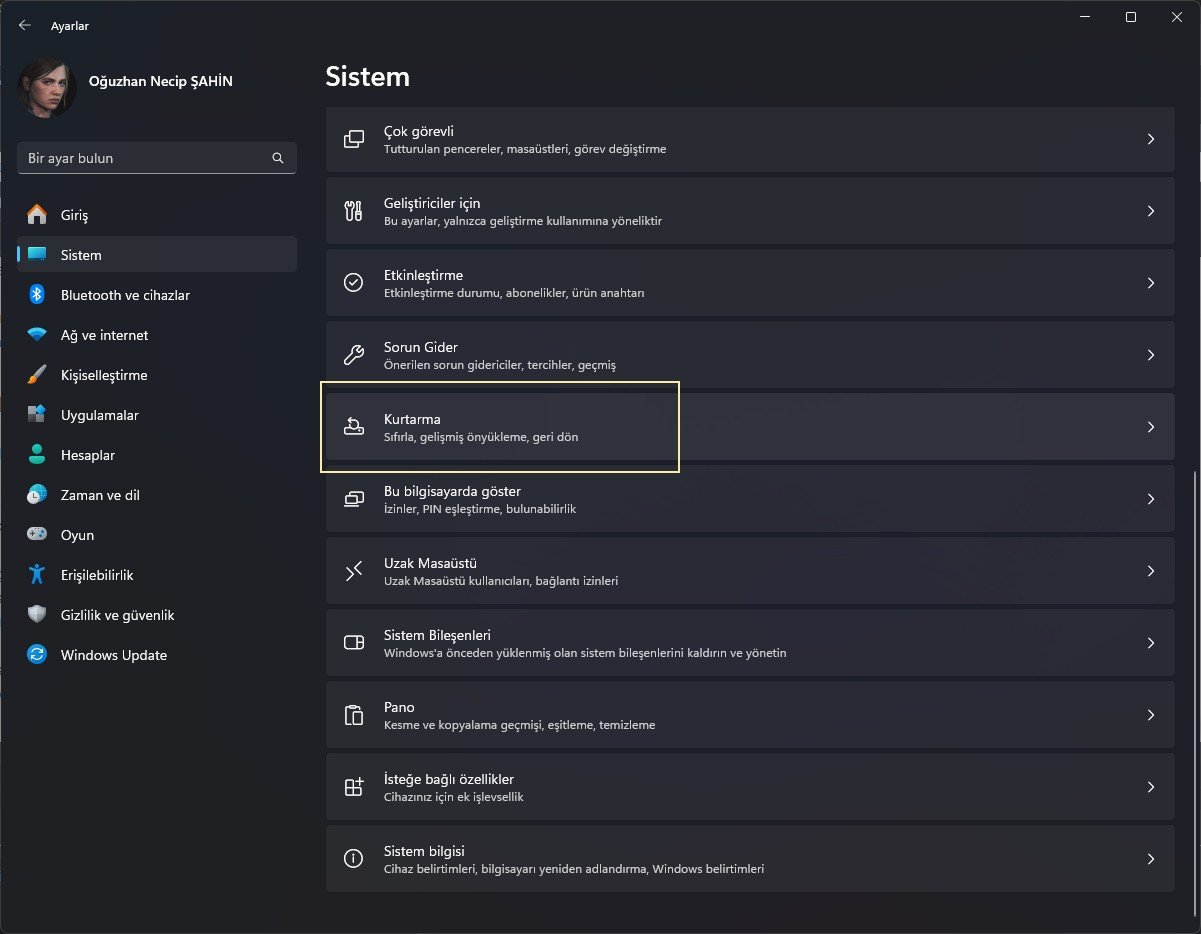
To go back to Windows 10, the backup that Windows 11 created earlier is used. You can also use the Recovery page to use this backup. The option to revert is an option you’ll only see if it’s within 10 days from the date you upgraded. If you cannot see this option, you can try the recovery options in the rest of the guide.
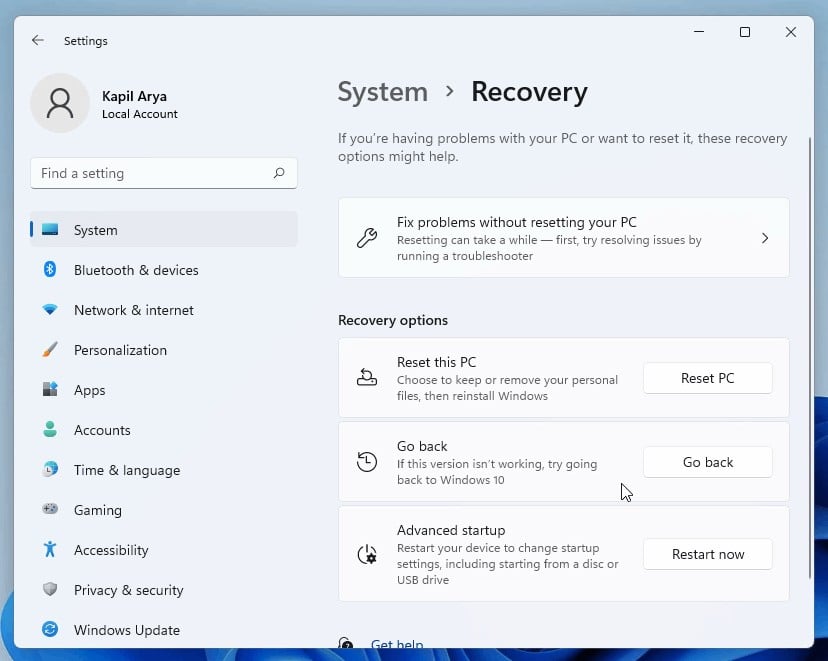
Step 3: When you select the go back option, Microsoft will ask you why you want to go back to Windows 10. You can choose any of the options on the screen and write your own answer if you wish. This answer often helps improve Windows 11. Once you choose your option or type your answer, you can select Next.
Windows 11 will then ask if you want to check for updates. These may help you solve the problems you are experiencing. If you want, you can try to solve the problems you are experiencing by making these updates. If you do not want this, you can continue the return process.
Step 4: Once you complete everything and select Next, Windows will offer you a Go Back button so you can go back to Windows 10. After selecting this option, your computer will automatically be reverted to Windows 10. Depending on the speed of your computer, this process may take between 5 and 30 minutes. When the process is finished, your system will restart and you will be greeted by the Windows 10 screen.
You should also remember that if your return to Windows 10 is successful, you may be asked to enter the password you used in Windows 10.
Downgrade After 10 Days or More
If more than 10 days have passed since you upgraded your system to Windows 11, unfortunately the above method will not work for you. In this case, if you want to go back to Windows 10, you need to perform a clean installation on your system. Unfortunately, this method means that everything on your computer will be deleted and you will have to start over.
Here, let’s talk about the method we prefer and recommend to you. You can install Windows 10 on your Windows 11 system with a clean installation by following the steps below. Before we start all the processes, let us say that you need a USB memory with 8 GB or more storage.
Installing Windows 10 with Clean Installation
- First we need to download an ISO file for Windows 10. You can get it free of charge from the link on Technopat.
- Afterwards, we need the Rufus program to write this file to the USB memory. You can also download the Rufus program for free from the same link.
- Plug your USB into the computer and open the Rufus program. Then, open the Windows 10 ISO media file you downloaded before and write it to your USB memory using the program. Please note that the data on your USB memory will be deleted during the process.
- When the burning process is finished, you will have a Windows 10 installation media. In this way, you can install it on the system you want.
- Restart your system and open the Boot menu as it boots up. You can check your motherboard’s manual to access the boot menu. You can usually access this menu with the F8 or F11 key.
- When the boot menu opens, select the name of your USB memory and start your system from this memory.
- If you have done everything correctly, the installation on your system will start after the motherboard logo on current systems.
At the end of the process, your computer will be completely reset and boot with Windows 10 installed. Note that after all this, you will need to create a new password and log in with an existing account if you have one.
If you want to go back before 10 days after installing Windows 11, you can also go back without doing a clean installation. However, if you exceed this period, unfortunately you will need to perform a clean installation to return.
Related Articles
- Writing Windows 10 ISO File into USB Memory
- Step by Step UEFI Windows 10 Installation